


The following should help with setting up your iOS device to use your idComm email.
USERNAME / PASSWORD NOTE: Usernames and passwords are NOT optional, they are REQUIRED, despite what it may say in those fields on your iOS device.
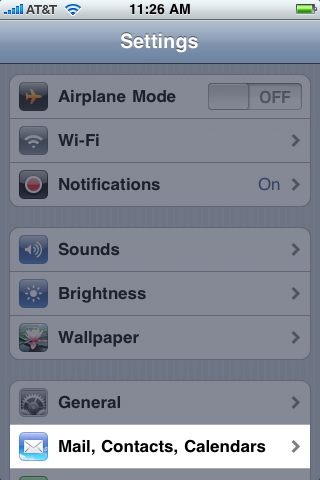
1. Select Settings from your iPhone home menu
2. Select Mail, Contacts, Calendars
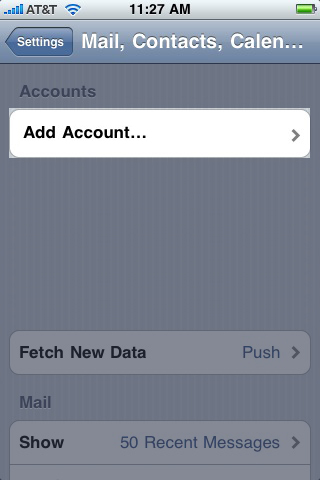
3. Select Add Account…
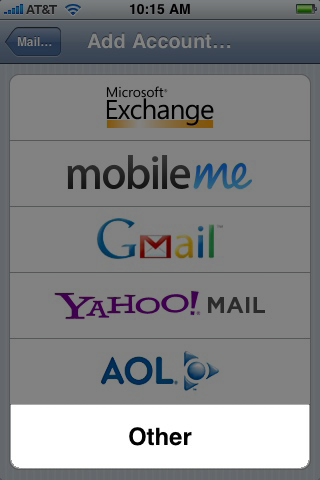
4. Select Other
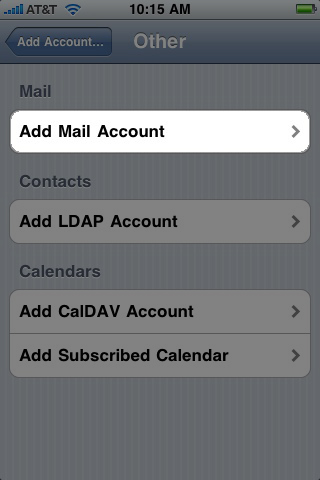
5. Select Add Mail Account
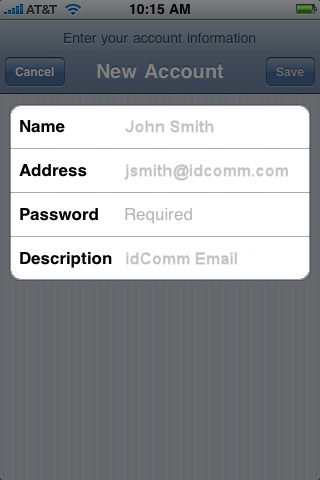
6. Instead of the information below, enter your real name (or a business name) your full email address, your email password (case sensitive) and a description for the mail account (like “idComm Email”).
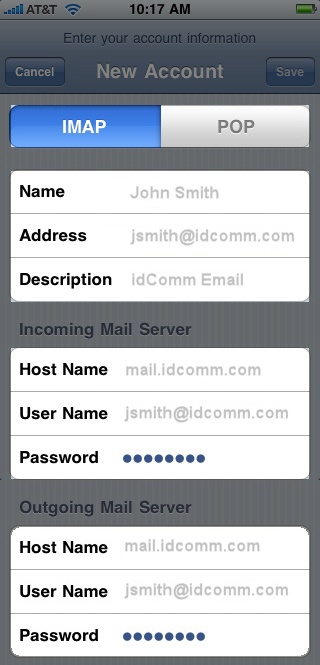
7. Select IMAP, make sure the name, email address, and description are correct, and enter the server information below, then click Save.
PLEASE NOTE: The user names MUST be your full email address, not just the part before the “@” sign.
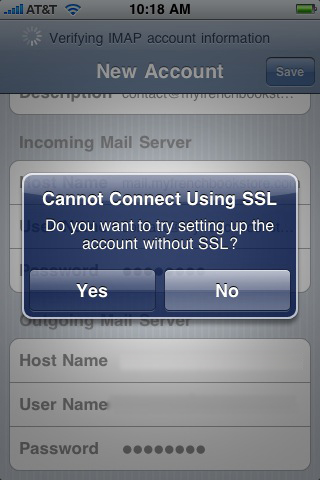
8. The iPhone/iPad may attempt to verify the information you entered, and you may receive the message “Cannot Connect Using SSL – Do you want to try setting up the account without SSL?” Select YES. You may get the same message again after a couple of minutes, so select YES again. After the 2nd attempt, it either should be successful for this part of the setup or at least have accepted the information you entered.
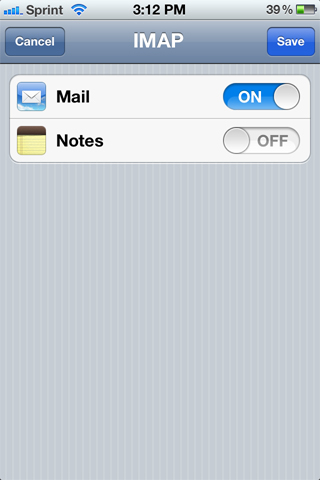
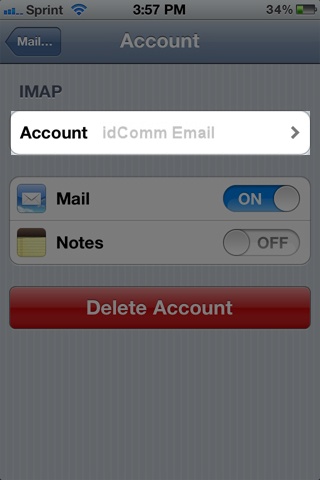
9. Mail should be set to ON and Notes should be set to OFF, Select Save
10. At this point, you may get a congratulations message, but you’re not quite finished.
CONTINUE WITH ADVANCED SETTINGS BELOW
11. From the iPhone/iPad Home Screen, Go to Settings / Mail, Contacts, and Calendars / Select the Account in Question / Select Your idComm Account
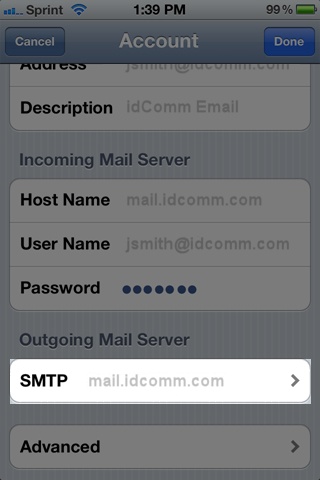
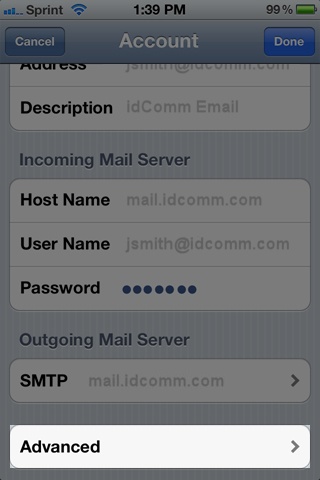
12. Under Outgoing Mail Server, Select SMTP
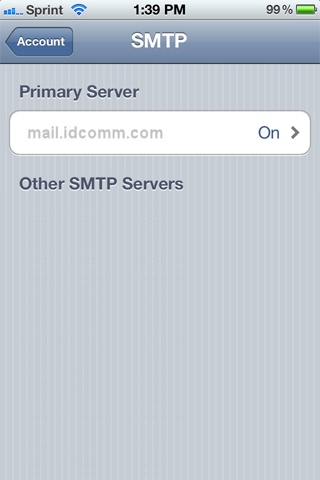
13. Confirm the Primary Server is ON, Select the Primary Server
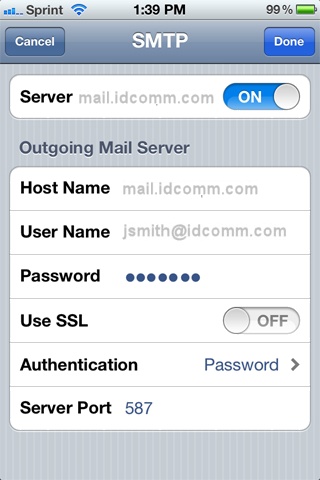
14. Confirm you’ve entered the Host Name, User Name (full email address), and Password fields. Make sure Use SSL is OFF. Set Authentication to PASSWORD. Make sure the Server Port is set to 587, press DONE, then select Account (top left)
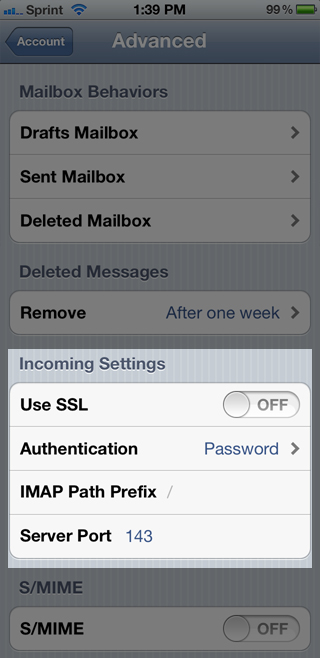
15. Select Advanced
16. Under Incoming Settings, make sure you’ve entered the Host Name, User Name (full email address), and Password fields. Make sure Use SSL is OFF. Change Authentication to PASSWORD. Make sure the Server Port is set to 143.
17. In order to save space on the mail server, you can edit your Mailbox Behaviors so that Drafts, Sent, and Deleted messages are stored on your iPhone/iPad. Select Drafts Mailbox.
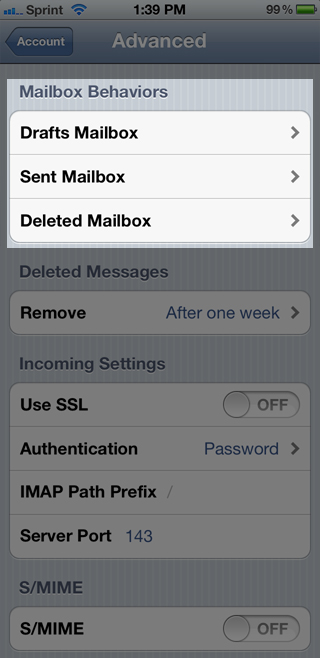
18. Make sure you have selected Drafts under On My iPhone. Repeat Step #17 and #18 for the Sent Mailbox & Deleted mailbox

Your iPhone/iPad should now be set up to use your idComm email account. :-)